Learning The Art Of Textured Paintings Using Acrylics
Want to jazz up your home decor? Textured art canvas is a fun way to add some creativity to your space. Even if you’re new to art, this step-by-step guide will help you create a cool piece that adds depth and style to any room.
Materials Needed:
Before you start, make sure you have everything you need:
- Canvas: Choose a size and shape that fits your space. You can get pre-stretched canvases at art stores.
- Acrylic Paint: Get a variety of colors you like.
- Paintbrushes: Use different sizes for different effects.
- Stencils or Stamps (Optional): These can help you add patterns.
- Mod Podge (Optional): This is a glue and sealer in one.
- Glitter, Beads, Sequins (Optional): For extra sparkle and texture.
Choosing Your Design
Decide what you want your artwork to look like. This will guide what materials and techniques you use.
- Get Inspired: Look at art online or in magazines to get ideas.
- Pick Colors: Choose colors that go well with your room.
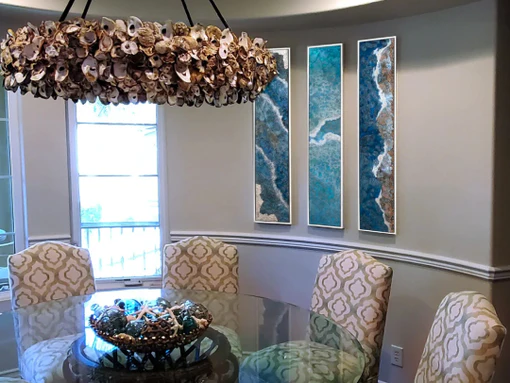
- Simple or Detailed: If you’re a beginner, start with something simple like coastal theme wall art. Use stencils for more complex designs.
- Sketch It Out: Draw a rough idea of your design on paper first.
Step-by-Step Instructions for Creating Textured Canvas Art
Let’s get into the process of making your textured canvas art.
Step 1: Prepping the Canvas
Preparing your canvas is an essential first step in creating textured canvas art. Here’s how to get started:
- Choose Your Canvas: Select the size and shape of the canvas you want to use. You can purchase pre-stretched canvases from art supply stores or online retailers, or stretch your canvas over wooden stretcher bars. The size of the canvas should fit the space where you plan to display your artwork.
- Prime Your Canvas: Apply a base coat of paint to the canvas boards using a paintbrush or roller. This base coat will provide a smooth surface for your textured materials to adhere to. You can use any color you like for the base coat, but a neutral color like white or black is an excellent choice to make the texture stand out. Make sure to cover the entire canvas evenly.
- Let it Dry: Allow the base coat to dry completely before moving on to the next step. This may take several hours, depending on the thickness of the paint and the humidity in your workspace. To ensure the paint is completely dry, gently touch it with your finger. If it feels cool to the touch, it is still wet and needs more time to dry.
Step 2: Applying Texture Paste
Texture or modeling paste is a thick, heavy-bodied material that can create interesting textures and shapes on your canvas. Here’s how to apply texture paste to your canvas:
- Choose Your Texture Paste: There are many different types of texture paste available, including heavy gels, modeling paste, and molding paste. Choose the type of texture paste that best suits the effect you want to create. Heavy gels are great for creating thick textures, while modeling and molding pastes can be used for finer details.
- Scoop Out the Texture Paste: Using a palette knife, scoop out a small amount of texture paste and place it on the canvas where you want to create texture. You can apply the texture paste in a random pattern or create deliberate shapes and lines. Start with a small amount and add more as needed.
- Spread the Texture Paste: Use the palette knife to spread the texture paste across the canvas, creating interesting shapes and contours as you go. Be creative and experiment with different techniques to create the effect you want. You can use various tools like combs, sponges, or even everyday objects to add unique textures.
- Let it Dry: Allow the texture paste to dry completely before moving on to the next step. This may take several hours, depending on the thickness of the paste and the humidity in your workspace. To ensure the paste is completely dry, gently touch it. If it feels cool to the touch, it is still wet and needs more time to dry.
Step 3: Drying Time
Letting the paste dry completely is super important:
- No Smudging: If you paint over wet paste, it will smudge and ruin your design.
- Better Adhesion: Dry paste sticks better to the canvas.
- Looks Better: Dry paste gives a more even look.
- Be Patient: Wait until the full drying time for the best results.
Step 4: Finishing Touches
After the paste is dry, it’s time to add the final details:
- Paint: Add layers of acrylic paint. Use bright colors for a bold look or soft colors for a subtle effect.
- Glitter: Sprinkle glitter on the paste for a sparkly touch.
- Beads: Glue on beads or sequins for extra texture and shine.
- Seal Your Art: Use Mod Podge or a clear sealer to protect your artwork.
Conclusion
Creating textured coastal theme wall art is a fantastic way to personalize your home decor. With some simple materials and a bit of creativity, you can make stunning pieces that reflect your unique style. Remember, the key to great art is to have fun and experiment for a Good designer artist. Happy painting!









Leave a Reply